Though not on my original list for this year's knitting goals, I taught myself something new! You see, one of my friends has been obsessed with knitting striped socks. And the more pictures and things I see the more intrigued I get. I'm waiting on a couple of gorgeous orders from Twisted Limone. But I was getting impatient. I was on the Knit Picks site looking for new cables to replace a few coming apart in my interchangeable set and while browsing came across the Felici. At that super affordable price I ordered enough for 4 pairs of socks. :) I cast on for my first pair about, um, 10 minutes after the mailman delivering my package on Saturday June 25. I finished Saturday July 2. That MAY be a new record for me. Though the real record is I finished 1 sock in just over 24 hours!
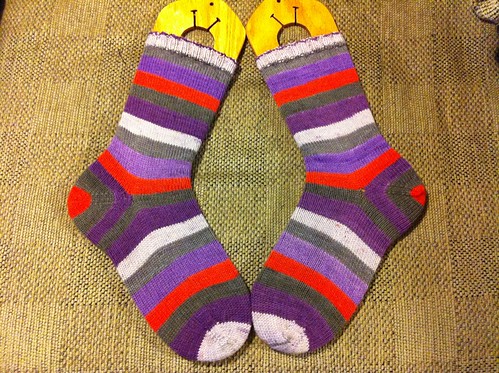
Anyway, here are the finished product.
I did lots of reading online to get some inspiration on how to actually go about doing this. Yarn Harlot has a blog post on this, but I wasn't sure I wanted to do it her way since I'd also seen a way using waste yarn. I was hoping to post here, but my google skills are not finding that post again.
Anyway, for my sock I used Judy Magic Cast On to cast on 32 stitches, 16 per needle. This is my go two cast on for toe up socks, and I can do it without having to look it up for reference these days.
I increased every other row until I was up to 64 stitches, 32 on the top and 32 on the bottom. Then I simply knitted a long tube. Since all my socks have been patterned lately it was refreshing to just knit a plain stockinette sock. I don't know that this would have been true if it had been a solid yarn. But watching the stripes form had me racing through to see the next stripe!
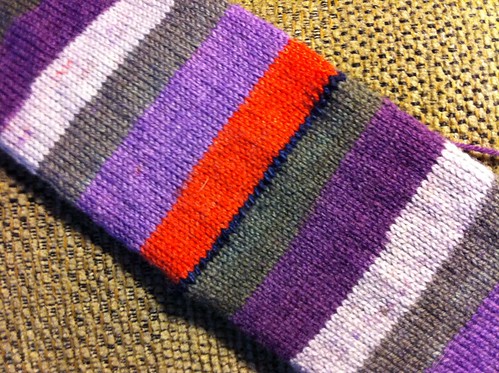
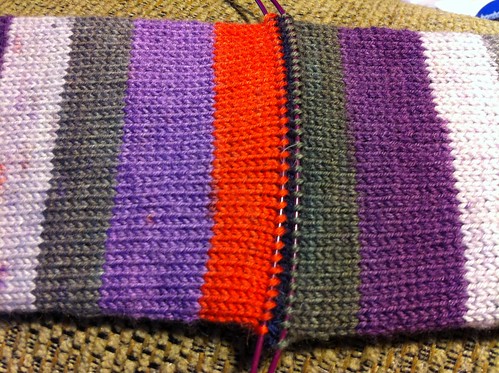
When the sock measured about 1 1/2 inches less than the length of my foot (as measured by trying on, this is why I love toe up socks) I picked up a strand of waste yarn and knitted across one half of the stitches with the waste yarn. I think picked up the main yarn again and knitted over the same stitches with it. For my socks I did this in between two stripes. I've seen many people do this in the middle of a stripe and I may do that next time, not sure. Anyway, here's the row of waste yarn. This will be pulled back out later and the heel will go here.
I continued along until sock was the length I wanted. I did the last full stripe in 2 by 2 ribbing and I bound off in the beginning of the next color.

Once finished it was time to work on the heel. I used my circular (size 1 for me) and picked up one side of each stitch along the bottom side of the waste yarn.

Then going in the same direction (because I'm going to knit in the round eventually, pick up one side of each stitch on the top side of the waste yarn.
Now its time to start working in the round. I had read that you should pick up a stitch or two on the sides to help avoid a small hole. It seemed like I had LOTS of space so I picked up three stitches on each side. I still ended up with a hole on each side so I'll need to work more on my technique here on the next pair. Oh, I also studied the yarn carefully to pick up for a new stripe that was different than the stripes I had ended on.
At this point I knit in the round, decreasing on each side every other row (4 decreases total per round). I decreased down to 12 stitches on each side. Then I did the kitchener stitch to close up the heel.
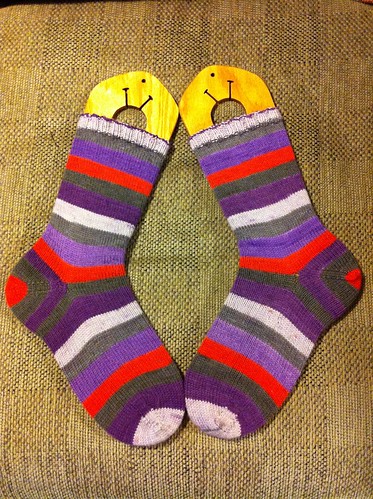
And voila, my first pair of afterthought heel stripey socks. Would you believe I cast on for my next pair already? :)
Anyway, here are the finished product.
I did lots of reading online to get some inspiration on how to actually go about doing this. Yarn Harlot has a blog post on this, but I wasn't sure I wanted to do it her way since I'd also seen a way using waste yarn. I was hoping to post here, but my google skills are not finding that post again.
Anyway, for my sock I used Judy Magic Cast On to cast on 32 stitches, 16 per needle. This is my go two cast on for toe up socks, and I can do it without having to look it up for reference these days.
I increased every other row until I was up to 64 stitches, 32 on the top and 32 on the bottom. Then I simply knitted a long tube. Since all my socks have been patterned lately it was refreshing to just knit a plain stockinette sock. I don't know that this would have been true if it had been a solid yarn. But watching the stripes form had me racing through to see the next stripe!
When the sock measured about 1 1/2 inches less than the length of my foot (as measured by trying on, this is why I love toe up socks) I picked up a strand of waste yarn and knitted across one half of the stitches with the waste yarn. I think picked up the main yarn again and knitted over the same stitches with it. For my socks I did this in between two stripes. I've seen many people do this in the middle of a stripe and I may do that next time, not sure. Anyway, here's the row of waste yarn. This will be pulled back out later and the heel will go here.
I continued along until sock was the length I wanted. I did the last full stripe in 2 by 2 ribbing and I bound off in the beginning of the next color.
Once finished it was time to work on the heel. I used my circular (size 1 for me) and picked up one side of each stitch along the bottom side of the waste yarn.
Then going in the same direction (because I'm going to knit in the round eventually, pick up one side of each stitch on the top side of the waste yarn.
Now its time to start working in the round. I had read that you should pick up a stitch or two on the sides to help avoid a small hole. It seemed like I had LOTS of space so I picked up three stitches on each side. I still ended up with a hole on each side so I'll need to work more on my technique here on the next pair. Oh, I also studied the yarn carefully to pick up for a new stripe that was different than the stripes I had ended on.
At this point I knit in the round, decreasing on each side every other row (4 decreases total per round). I decreased down to 12 stitches on each side. Then I did the kitchener stitch to close up the heel.
And voila, my first pair of afterthought heel stripey socks. Would you believe I cast on for my next pair already? :)
Comments